If you’ve ever wanted to learn how to make a sourdough starter for bread baking but felt intimidated, you’re not alone.
Many beginners think sourdough is complicated, too time consuming, or too hands on.
But making a sourdough starter from scratch is much easier than it sounds.
A sourdough starter is just flour, water and time to naturally ferment.
With a little patience, and a simple daily routine you can grow a strong, active sourdough starter, even as a beginner.
The steps I’m sharing today are the exact steps I used to cultivate my starter back in 2018.
After a few years of feedings, discarding, and lots of practice baking bread, this journey led me to the start of my in-home cottage food microbakery from simple flour and water.
By the end of this post, you’ll better understand the following:
- What a sourdough starter is and how it works
- How to maintain a sourdough starter (and what signs to look for)
- Converting starter for use in recipes
- Access to the exact steps to use to start your sourdough starter from scratch!
What is a sourdough starter?
A sourdough starter is a mixture of flour and water that has been fermented by naturally occurring wild yeast and bacteria.
This blend creates an environment where yeast ferments sugars in the flour, producing carbon dioxide and alcohol.
Simultaneously, lactic acid bacteria contribute to the sour flavor that characterizes sourdough bread.
How to Maintain a Sourdough Starter
With your sourdough starter established, it is critical to maintain it properly to keep it healthy and ready for baking.
How To Feed A Sourdough Stater
Regular feedings are essential to provide nutrients to the yeast and bacteria in your starter.
- Frequency:
- If you bake often (at least once a week), keep your starter at room temperature and feed it daily.
- If you bake less frequently, store the starter in the refrigerator and feed it weekly.
- Feeding Ratio: A common feeding ratio is 1:1:1 (starter: flour: water). For example, if you have 100g of starter, you would feed it with 100g of flour and 100g of water.
Signs of a Healthy Starter
A well-maintained starter will show the following indicators:
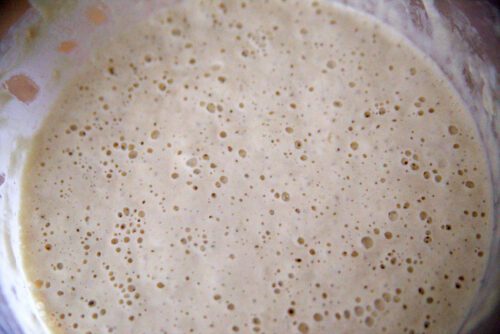
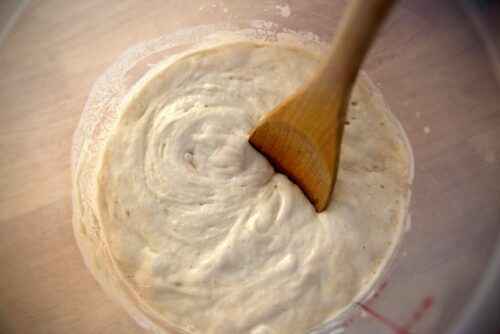
- Bubbles: Active fermentation produces bubbles throughout the mixture.
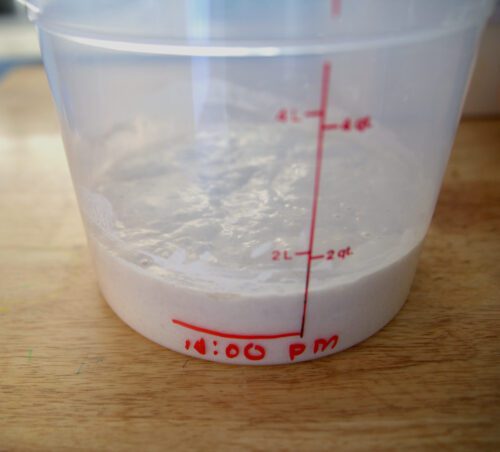
- Doubling in Volume: Your starter should ideally double in size within 4 to 6 hours after feeding.
- A Tangy Aroma: A pleasant, sour smell indicates the presence of lactic acid bacteria. If you smell an off or rotten odor, discard the starter.
Common Problems When Making Sourdough Starter
Maintaining a sourdough starter can sometimes present challenges. Here are solutions for common issues:
- Starter is Too Sour: This can occur if it is left too long between feedings. To balance the acidity, make sure to feed it more often and increase hydration by adding slightly more water.
- Starter is Flat: If your starter does not rise after feeding, it could be a sign of inactivity. This may result from using old flour, improper storage, or insufficient feeding. Discard half the starter and feed it again to rejuvenate it.
- Mold: If you see mold on the surface, discard the starter immediately. Mold can have dangerous effects and compromise your starter.
Hydration Levels
Hydration levels significantly affect your starter’s behavior and baking results.
- High Hydration (1:1:1): This typical ratio is often used for a 100% hydration starter, meaning equal parts starter, water and flour. It results in a slightly more liquid starter that fosters increased activity.
- Low Hydration (1:2:1): Reducing water in your feedings creates a thicker starter that may rise more slowly but can be beneficial for certain types of bread. An example of a lower hydration is typically 1 cup starter, 2 cups flour and 1 cup water.
Storing Your Sourdough Starter
Depending on your baking frequency, you will need to store your starter appropriately.
- Room Temperature: If you bake often, store it at room temperature and feed it daily to keep it active.
- Refrigeration: If you bake infrequently, a refrigerated starter can be maintained. Before using it, feed it once or twice at room temperature to reactivate it.
Reviving a Dormant Starter
Reviving a dormant stater is best done with a starter that has been left unfed in a cold environment.
Trying to revive a dormant starter left at room temperature for several days is not advisable as the starter may have already started to spoil
If you haven’t used your cold, unfed starter in a while and find it sluggish or inactive, reviving it may take some time:
- Remove the Old Starter: Start by discarding half of the starter so that only a manageable amount remains. Begin to separate out a portion of starter you want to fed on a daily basis at room temperature.
- Feed it More Frequently: Increase your feeding schedule by feeding it every 12 hours or less with the typical 1:1:1 ratio until it shows vigorous activity again.
- Check for Bubbles: Ensure that it begins to bubble and rise reliably before proceeding to bake with it.
Converting Starter for Use in Recipes
When using your sourdough starter in recipes, keep in mind that it is often necessary to calculate the amount of flour and water in the starter when adjusting your dough recipe:
- Consider the Weight: A typical recipe may call for a specific weight of starter.
- Adjust Ingredients: Calculate how much flour and water is contained in the starter. For example, if your recipe requires 200g of starter, which consists of 100g flour and 100g water, adjust the total flour and hydration in your bread recipe accordingly.
Baking with Your Sourdough Starter

Once your starter is healthy and active, the real fun begins! You can create an array of delicious baked goods, including:
- Sourdough Bread: Baking bread using traditional methods of long fermentation with sourdough makes any bread better.
- Pancakes: Use your starter to make fluffy sourdough pancakes.
- Pizza Crust: Sourdough pizza has a unique flavor that enhances toppings.
- Baked Goods: Muffins, bagels, and even cakes can benefit from a sourdough starter!
Success With Sourdough
Maintaining a sourdough starter can seem daunting at first, but with practice and proper care, it becomes a rewarding and enjoyable process. The key lies in regular feedings, observation, and adjustments based on your starter’s behavior.
Enjoy the art of sourdough and enjoy the satisfaction of creating your own delicious loaves and treats from scratch!
>>>Here are the exact steps you can follow to start your own sourdough starter from scratch!>>>
Helpful FAQs About Sourdough
1. What flour is best for feeding a sourdough starter?
If you are brand new to feeding your starter, it’s best to start with organic, unbleached all-purpose flour.
It’s important to learn how often your starter needs to be fed, while learning how to recognized when your starter is active, bubbly and at it’s peak.
2. Can I bake with my sourdough starter right away?
If you want the benefits of sourdough, it’s best to allow your starter to mature for at least 7 days.
You’ll know when your starter is ready for baking once you see physical bubble activity and at least doubling in size. It takes at least 7 days of fermentation for a brand new starter to reach this point.
3. How often should I feed my starter?
When you are first establishing your starter you should plan to feed your starter two times per day.
After your starter is mature, active and bubbly usually after 7 days you can feed your starter one time per day.
Whenever you need to take a break from your starter you can store it in the refrigerator. Plan to feed your starter once every few weeks.
4. What is the black liquid on top of my sourdough starter?
The black liquid on top of your sourdough starter is called hooch. Hooch appears on top of your sourdough starter after it’s been stored in the refrigerator for a few weeks.
Hooch is completely harmless and can easily be poured out before feeding your starter. Hooch is simply your sourdough starter communicating it’s hungry and ready for a fresh feeding!